Alors j'ai trouvé sa sur le net je vais vous en faire part , c'est en anglais mais bon si vopus avez des questions de traduction j'ai a peu pres tous compris.
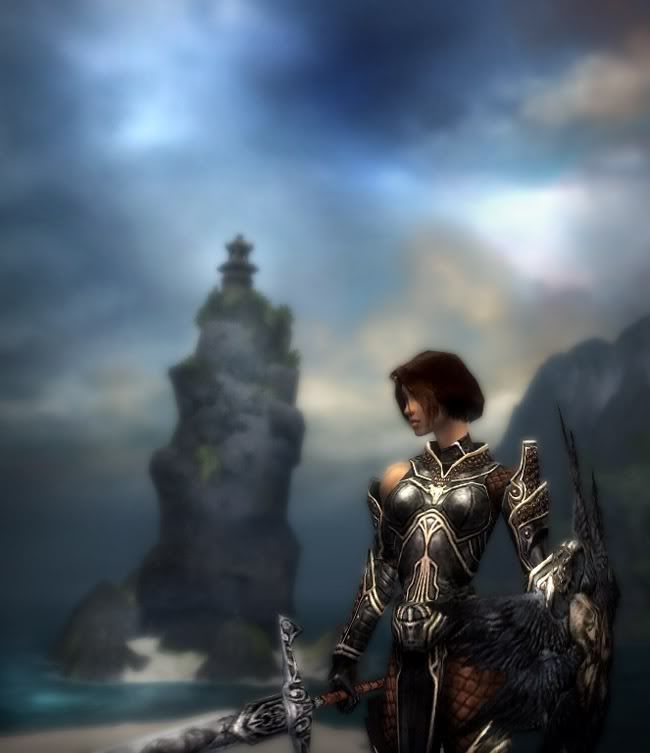
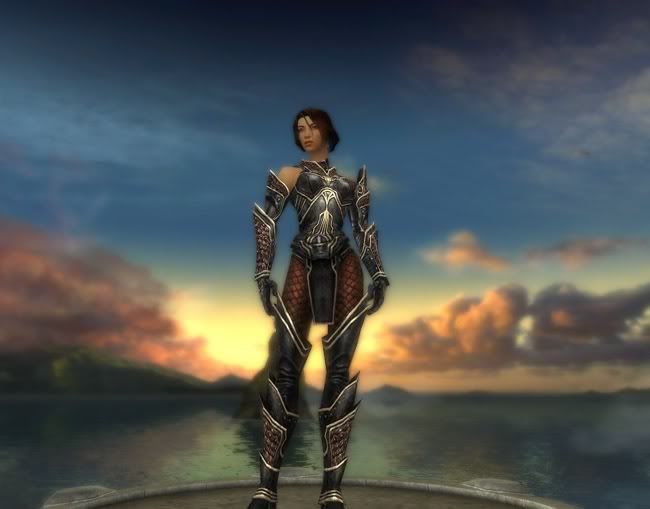
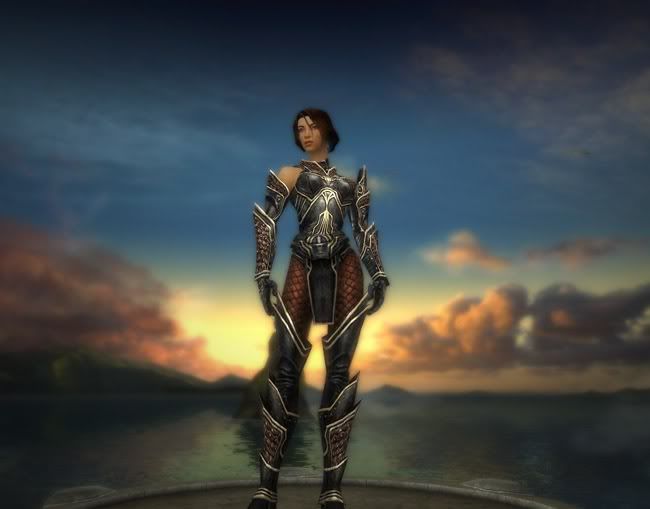
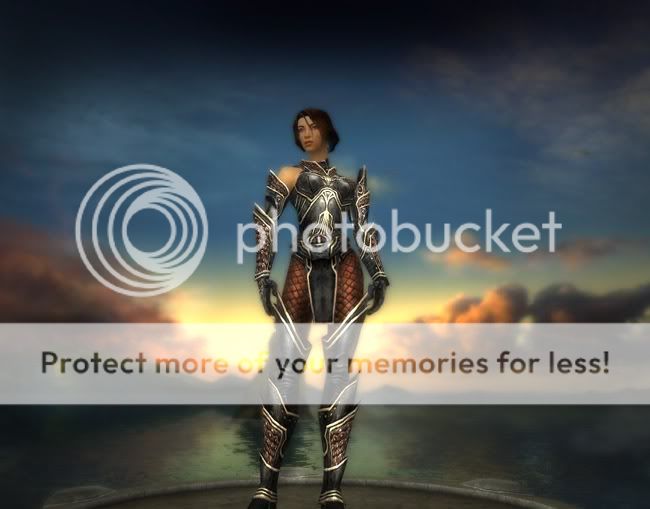
Step 1: An image. I decided to pick the introduction screen right after login in. Isako has, once again, agreed to pose for me, so here she is in regular screen capture.

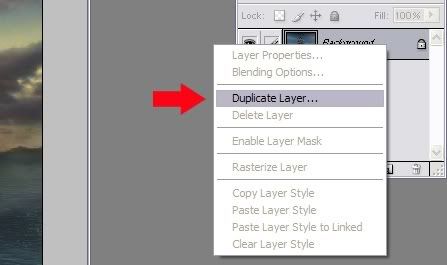
Step 2: On the lower right on the Photoshop screen, I right-click on the image and choose
Duplicate Layer. This effectively creates a copy of the image and it is placed right on top of the original image. Think of it as two plates of glass placed on top one another.
Step 3: Now, let's blur our image. Remember that Photoshop will apply all effects on the top layer (the one we've just made) unless we tell it otherwise. this is exactly what we want. To do that, go on top, select
filters, then
Blur, then
Gaussian Blur.
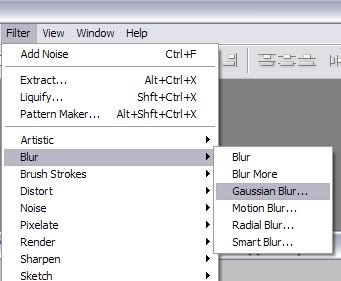
At this point, before Photoshop applies the Gaussian Blur, you must set the Gaussian effect. I usually set it at
3.0 pixels which provides a nice 35mm effect.

Step 4: At this point, this is the image we have:

The nice effect of the Gaussian Blur is that it creates a faint and soft halo around just about everything. Isako here has not escaped this nice effect as you can see.
Step 5: Now, we must uncover Isako from the blur. Now you'll notice that the blur is relatively strong and we must see very clearly what we are doing. In order to do this, go to the lower right again, select the
opacity and set it at around 75%. Our top layer will become transparent enough to let us work.

Step 6: If any of you in this thread mentioned using the
Eraser Tool, well, they were right. But because of the Gaussian Blur, our erasing will let us cut Isako from the background all the while keeping our blur effect. Go to the side tools, select the
eraser tool and set it's size at about
Hard round 5 pixels.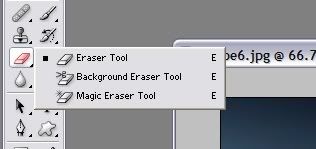

Step 7: Start erasing carefully around the character without going over in the background. Only erase the character itself. If a space is too small, select a smaller size. Keep on doing this until you've uncovered the character entirely.
Step 8: At this point, my image looks like this:
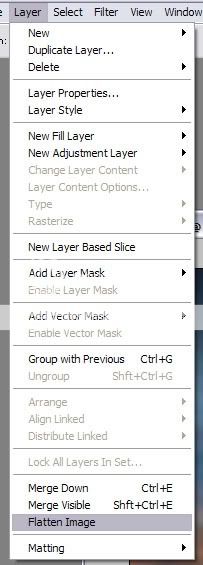
Step 9: This is the point where we don't need 2 layers anymore. Select
Layer then
Flatten Image.
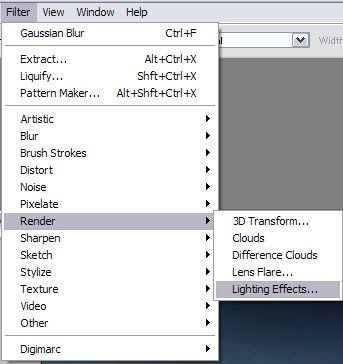
Step 10: Here, I usually use a lighting effect. Go to
Filter,
Render then
Lighting Effects.
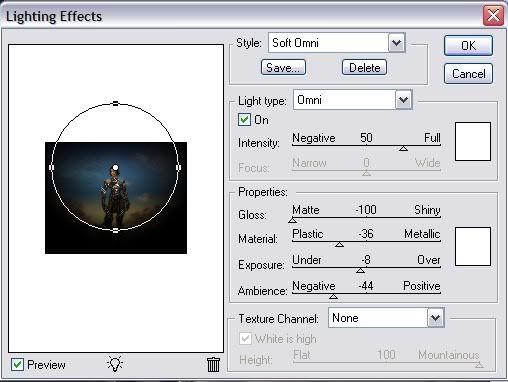
Step 11: We don't want our lighting effect to be too bright or anything. that's why I use the
Soft Omni . But before applying the effect, notice the different options of the lighting effect? Set the
Gloss to
Matte . Leave the other ones like they are. Also, you can select the center of light and it's radius. Play with it and see what size pleases you more. Then click
ok.
Step 12: At this point, my image now looks like this:
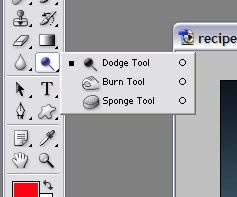
Step 14: Let's lighten the image. Some areas could use a bit of uplift in term of light. Isako's armor for instance has some nice gold linings that could benefit some exposure. For that, go to the left-hand side toolbar and select the
Dodge tool. With this, everything you'll click or pass on will become brighter.
Here again, selecting the size of the brush is important. For Isako I wanted something not too large and not too small. I've selected
Soft Round 35 pixels.

Step 15: Here's what my image looks like right now. Notice how Isako's armor has become brighter?

Step 16: We're almost done. Some areas need to be darker. Not too much, just a bit. For that, right-click on the
Dodge Tool again and select the one right under: the
Burn Tool.
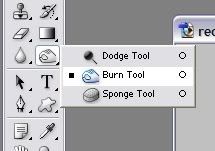
This one is the opposite of the dodge tool. Everything you'll click or pass on will become darker. Don't overdo it unless you want to set a special tone. If you go back to my first post, check the last image depicting my ranger Noa. Notice how much I've used the Burn Tool in order to achieve the incoming thunderstorm. By using the burn tool properly, you can provide with some nice dramatic effect.
We're done. Easy huh? Now let's look at my result by comparing the original and the end result:
Original image:
Final image using the technique described here:
Bon j'ai essayer alors voila mon image de depart

Et voila ce que j'ai fait avec 2-3 trucs en plus

![Guilde Solst Tolundur Dinasty [STD]](https://2img.net/r/ihimizer/img151/2841/baniereleretour8wc.jpg)